Linux Bare Metal Recovery with Cohesity
This is essentially "part 2" to my previous blog, which details the steps for executing a Windows BMR job using Cristie CoBMR, a product that provides bare metal recovery in conjunction with Cohesity DataProtect.
There's a version of this for Linux, and it has a different interface and workflow. However, the end results are the same - a system recovered from a Cohesity backup to either similar or dissimilar hardware.
1)Download the agent from the Cohesity cluster and run the install command:
rpm -i el-cohesity-agent-6.x.x.1.x86_64.rpm
2)Afterwards, make sure you've downloaded the CoBMR agent for Linux. The rpm can be installed with this command:
rpm -i cobmr-9.1.1.x86_64.rpm
3)The rest of the configuration on the Cohesity cluster follows the same general rules as for Windows: add the Linux client as a source, and create a file-based physical protection job with the Linux client included as an object.
Once successful backups are available on the cluster, you are ready to perform a bare metal recovery...
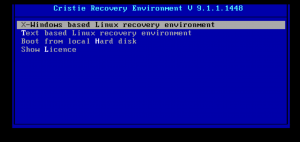
4) Boot the recovery hardware using the the latest "xbmr" ISO from Cristie. There is an option to boot and run from command-line, but we'll be doing this using the GUI (select Windows based Linux recovery environment):
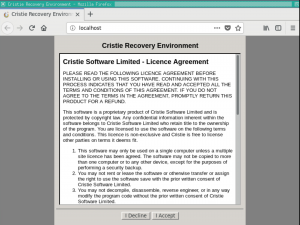
5) Click "I Accept" on the License Agreement window:
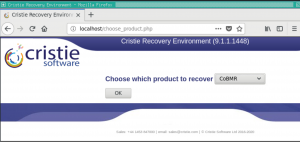
6) The Linux version of the Cristie software is a multipurpose product - you can use the same ISO to run BMR on other backup products for which Cristie offers integration. Select "CoBMR" from the dropdown list:
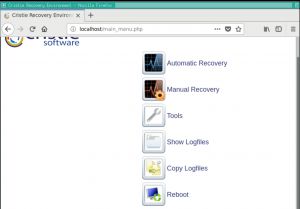
7) Clicking OK takes you to the main menu of the interface:
8) Click on Tools, which will display several options. You can set the root password or load a custom driver, for instance.

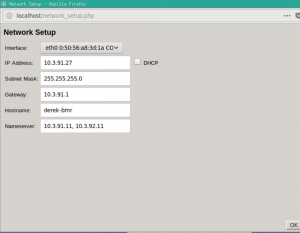
9) We will select Network Setup so we can assign an IP address to this machine.
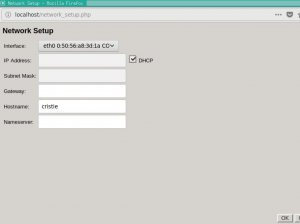
10) Here you will specify the static IP address (unless using DHCP), along with the netmask, gateway, hostname, and nameserver (DNS server) info, then click OK:
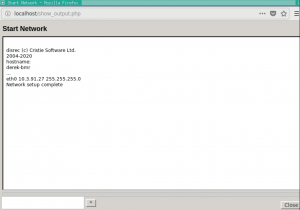
11) Network settings will be applied, then you can click Close.
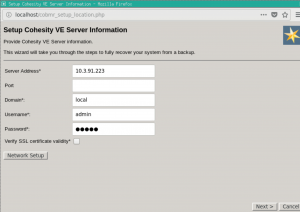
12) On the next screen, we will input the IP address of the cluster, the domain to log onto (local cluster domain or LDAP), and the username/password to use for authentication to the cluster.
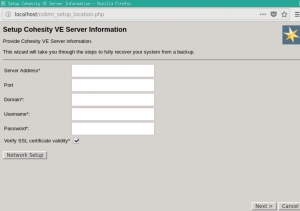
Special note: Be sure to uncheck "Verify SSL certificate validity" - this is not necessary if you are using the self-signed default Cohesity certificate, and can actually impede successful connection to the cluster if you still have the default cert in place (most users will).
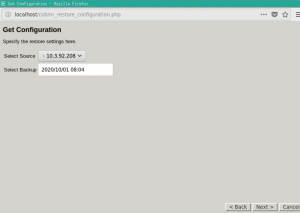
13) Select Backup to recover from. A calendar view is offered, which highlights every date containing at least one restore point.
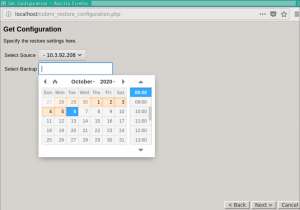
14) Select the desired date/time and click Next.
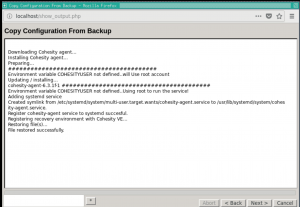
The Cohesity agent is automatically downloaded from the cluster and installed on the recovery hardware, along with the configuration file pertaining to the source client.
16) The next screen has several buttons and checkboxes...
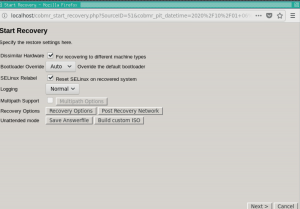
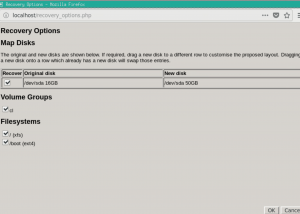
Clicking on "Recovery Options" allows for disk mappings to be changed, if desired:
Similarly, clicking "Post Recovery Network " will display fields you can populate to specify the network settings of the system once recovered: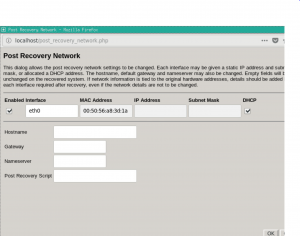
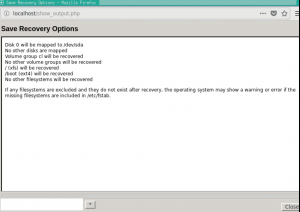
17) Once Recovery Options have been applied, a confirmation window displays:
18) The recovery will now begin. The time to complete will largely depend on the amount of data and files being restored, of course.
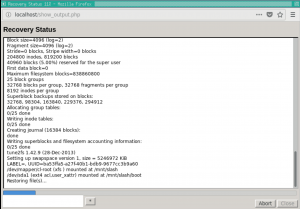
Once the recovery is finished, you will see a small pop-up window confirming completion:
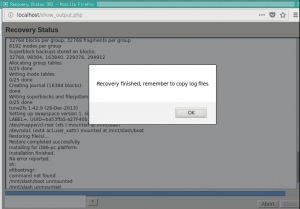
After clicking "OK" and closing the recovery window, you'll be taken back to the main menu screen. Here, you can view the log files, or copy them to an NFS mount point.
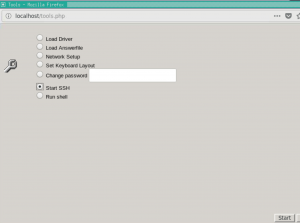
Bonus Tip: Setting the root password and enabling SSH can come in handy here, as you can simply use WinSCP to copy the log files to your local machine...
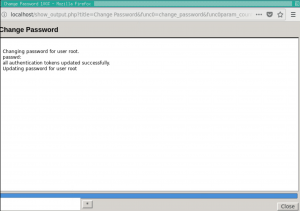
a) Go back to "Tools" under the Main Menu, and click on the radio button for "Change Password" and enter your desired root password. Click Start.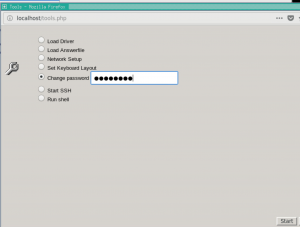
Password will update. Click Close.
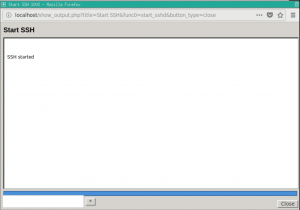
b) Follow the same steps to enable the "Start SSH" option.
That's all! Feel free to message me if you come across any questions.