Step-by-Step: Adding Disk Storage to Dell EMC VxRail
This process below shows two methods to add a new disk to a disk group or to multiple disk groups.
Method 1
1. Add the physical disks into the correct nodes for VxRail
2. Open vCenter
3. Click on the VxRail cluster
4. Select the configure tab. Scroll down to the vSAN section and select Disk Management
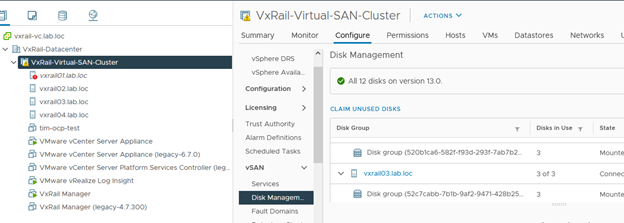
5. This view will show each node and its disk group below each node
6. Select the appropriate disk group under each node and click "Add Disk:" from the menu
7. When you click Add Disk, it will populate with the disks that the node sees as available (not in use)... check the disk or disks that you would like to add to the group and select "Add"
8. Repeat this process for each node and each disk group that you'd like to add
Method 2
1. Add the physical disks into the correct nodes for VxRail
2. Open vCenter
3. Click on VxRail cluster
4. Select the Monitor tab and scroll down to the VxRail section and click on "Appliances"
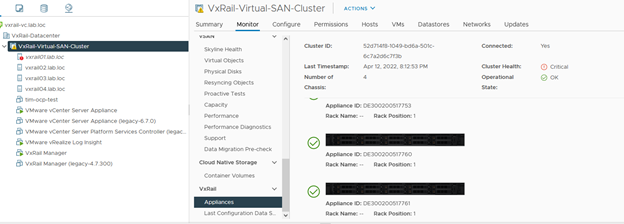
5. Select the node (physical picture) that you would like to add the disk to and on the right hand side, select "Actions" menu and choose "Add Disk"
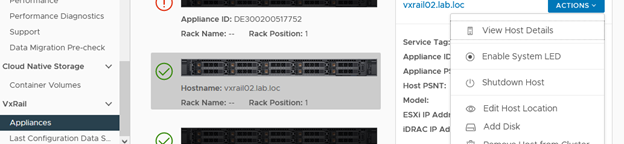
6. Next you have the option to select if you have already added the disk or let the VxRail suggest where to add the disks (slot)
7. The system will look for the unused disks that are installed in the node and present them
8. Select the appropriate new disks and click "Add Disk"
9. System will load the new disk and start the rebalance
The follow up and check on the rebalancing status:
1. Click on the node in VxRail and on the right hand window, select "Monitor"
2. Scroll down to VxRail and select "Skyline Health"
3. This will show the rebalancing process for the nodes and give you status