Run:ai – QuickStart Guide
Creating a Project
The first step is to create a new project. In the left hand toolbar select Projects and you should land on a page similar to the one shown in the screenshot below.
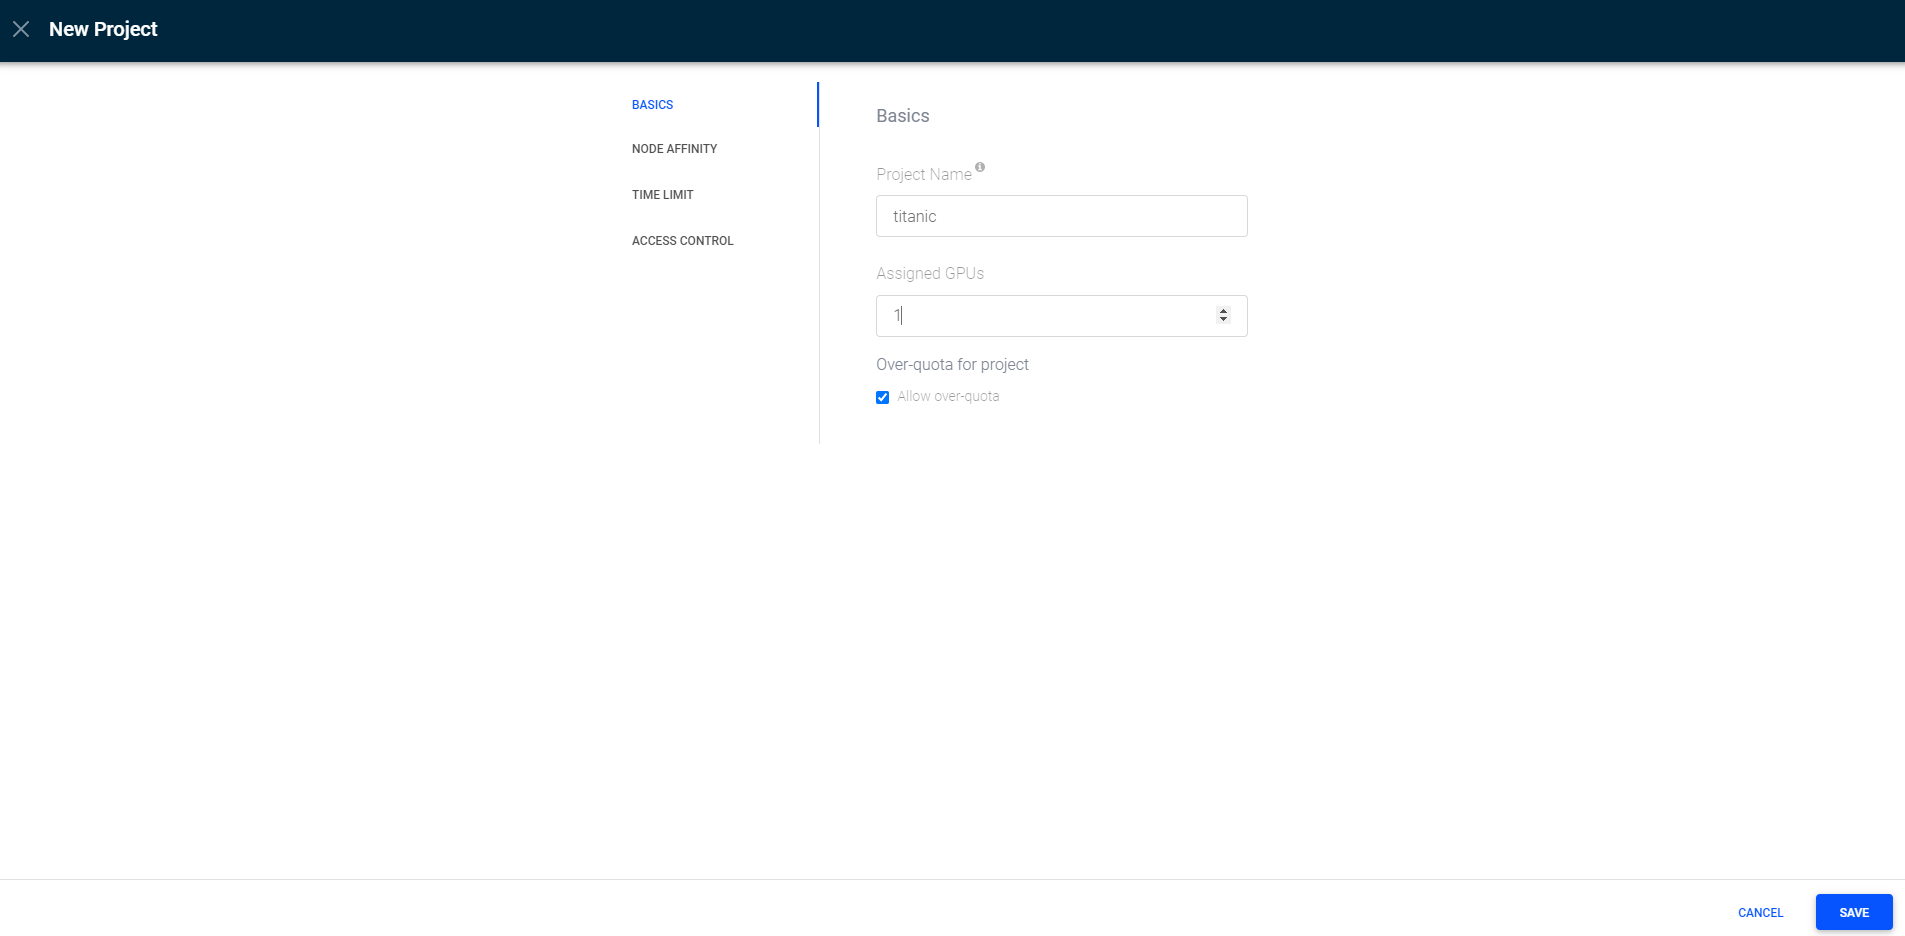
 Select + New Project in the top right corner. Give your project a fitting name and select the number of GPUs you would like available to jobs run as part of this project. Keep in mind that the project name must start with a lowercase letter. In the left toolbar you can also find other options you can change for your project including setting time limits, limiting access to certain users, and specifying which nodes your project’s jobs should run on.
 After clicking Save in the bottom right corner you should see your project in the list on the Projects page.
Starting a Job
Next let’s start a job. In the blue toolbar on the left side of the screen select the Jobs option. It should look similar to the Projects screen. Click on + New Job in the right top corner. The screen that pops up should look like the screenshot below.
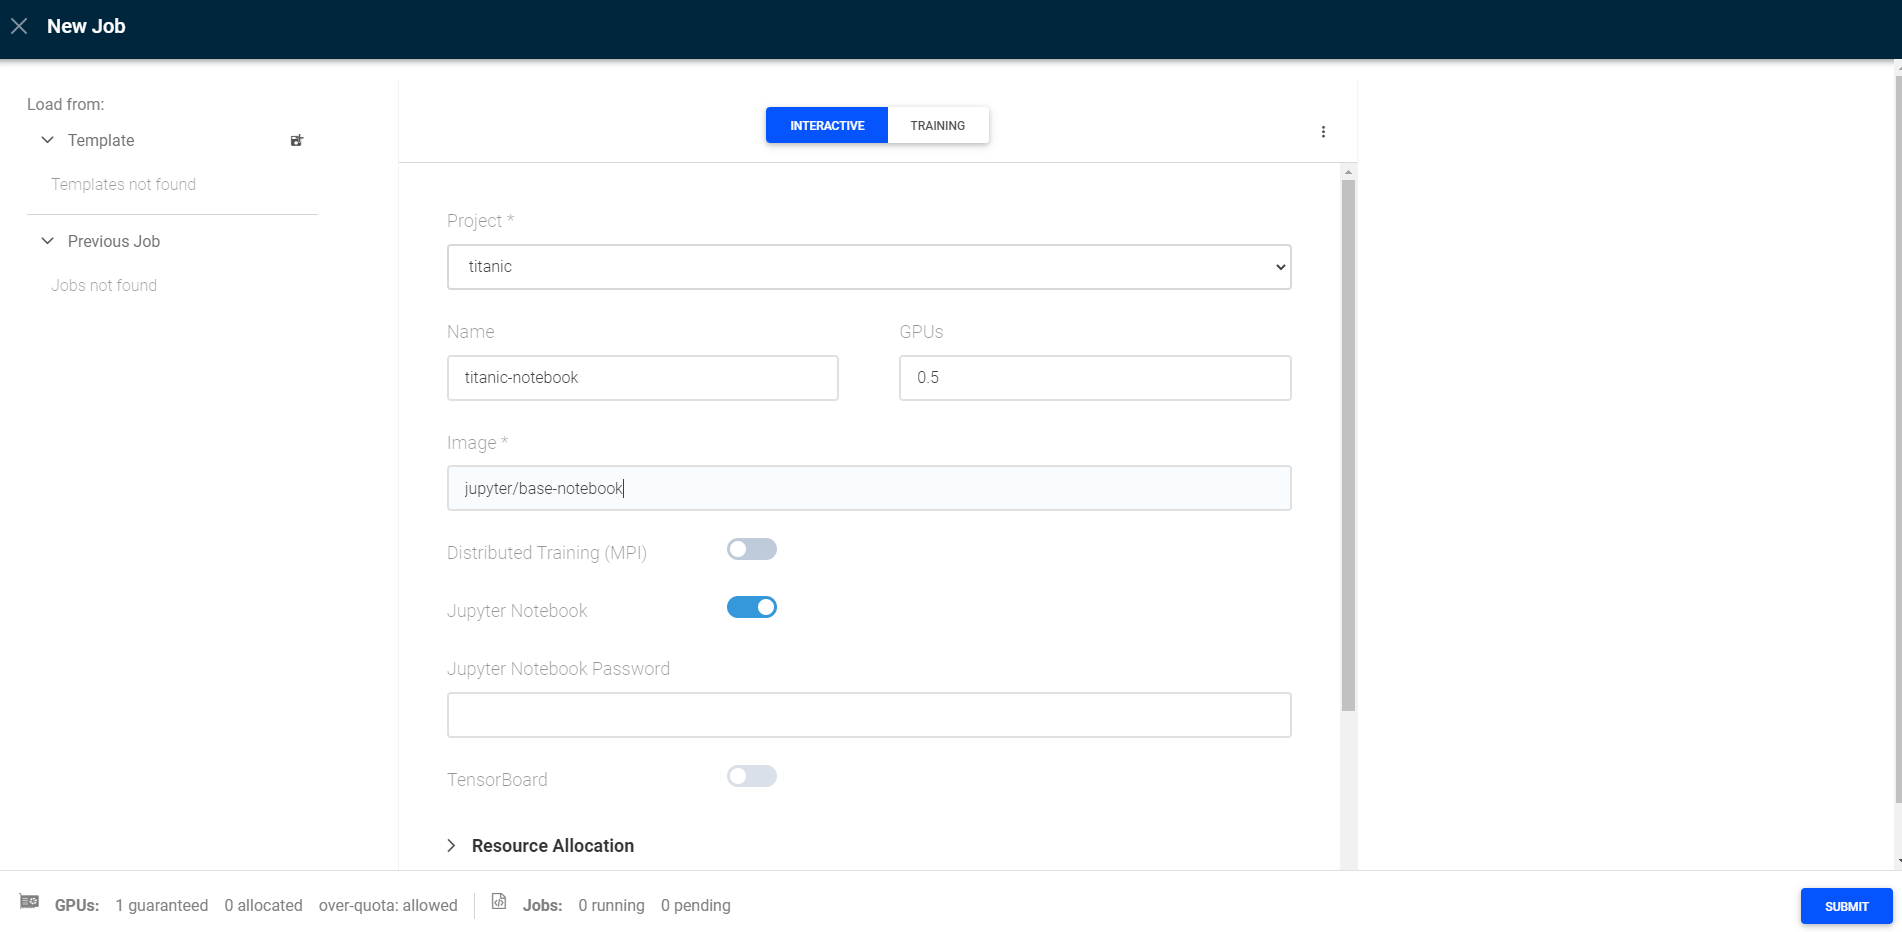 First select Interactive rather than Training at the top of the screen. Select the project you created in the first portion of this guide and then name your job. In the GPUs box you can select how much of your Project’s assigned GPU resource you wish to use for this job. You can use fractions to denote part of a GPU as shown with the 0.5 in the screenshot above. In this case I put jupyter/base-notebook as the Image name but you may need to check what Images are available to you in your installation of RunAI. Then select the toggle for Jupyter Notebook (leave the Password field blank unless you want a password) and click Submit in the bottom right corner.
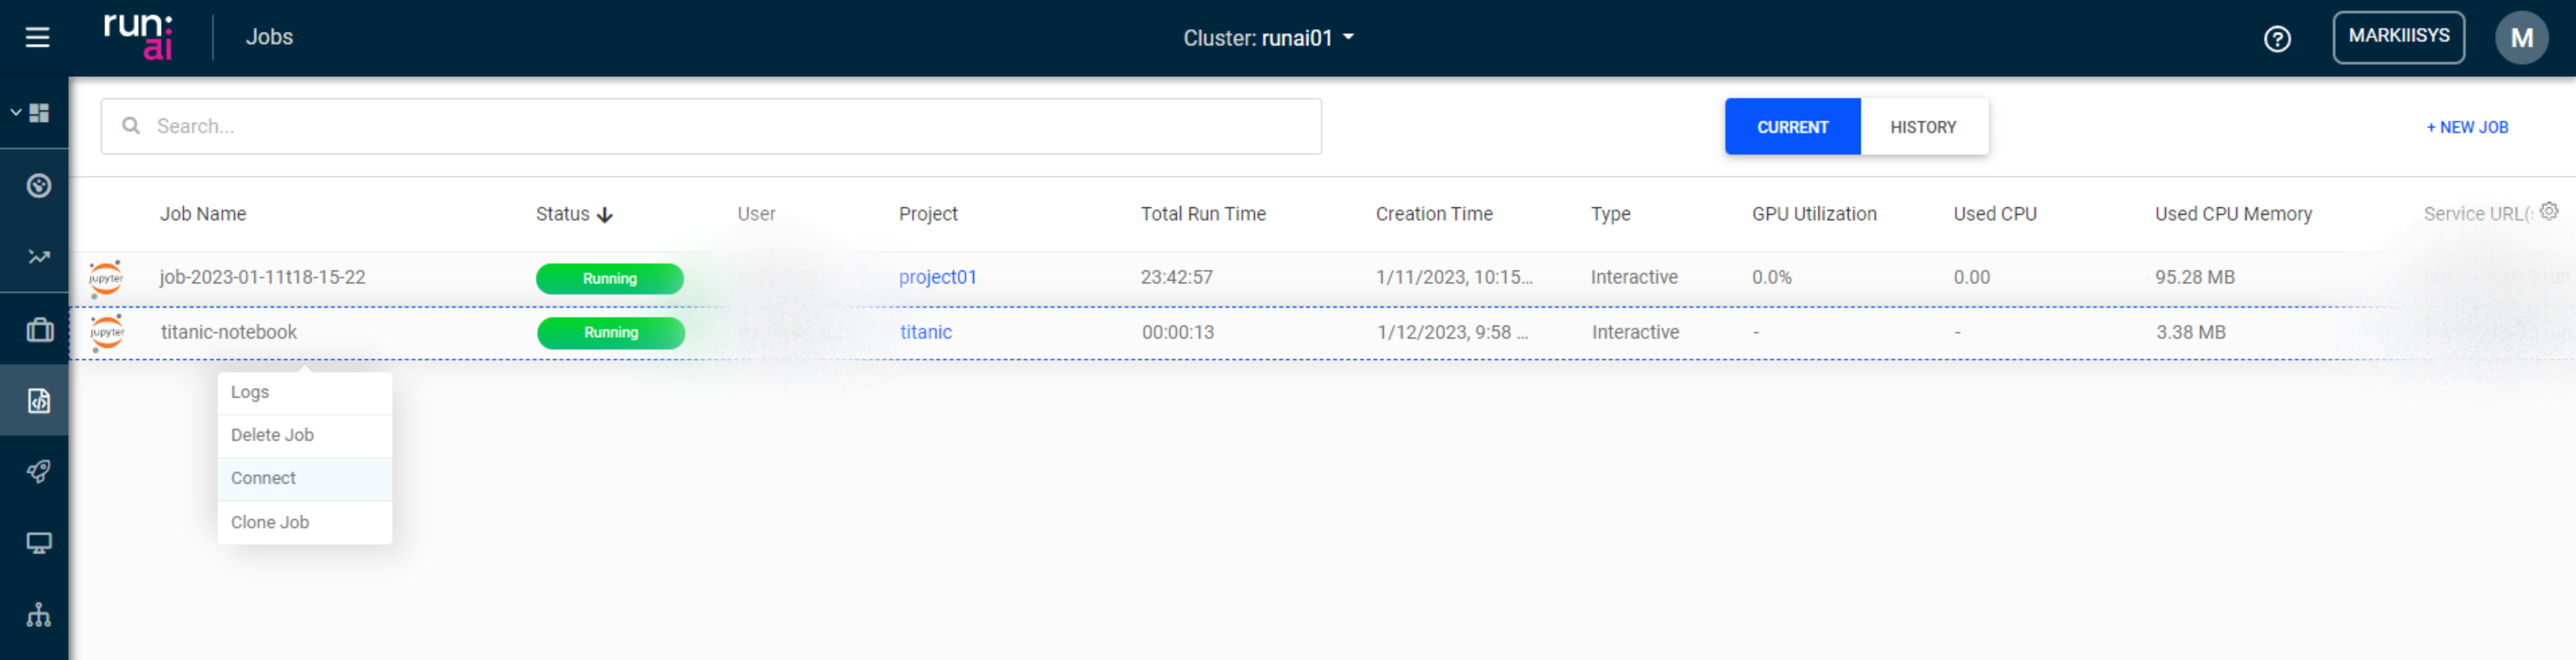
You should see the new job added to the main Jobs page. Wait until the bar under Status turns green and says Running. Then right click on the job you started and click Connect as shown in the screenshot below.
 This should open up a new tab in your browser showing a JupyterLab instance. From here you can do your work using the resources allocated in the previous job creation step. When you are done working, navigate back to the Jobs page in RunAI and click on the job name of the notebook job we are using. More information and options for this job should appear on the right hand side of the screen as shown in the screenshot below.
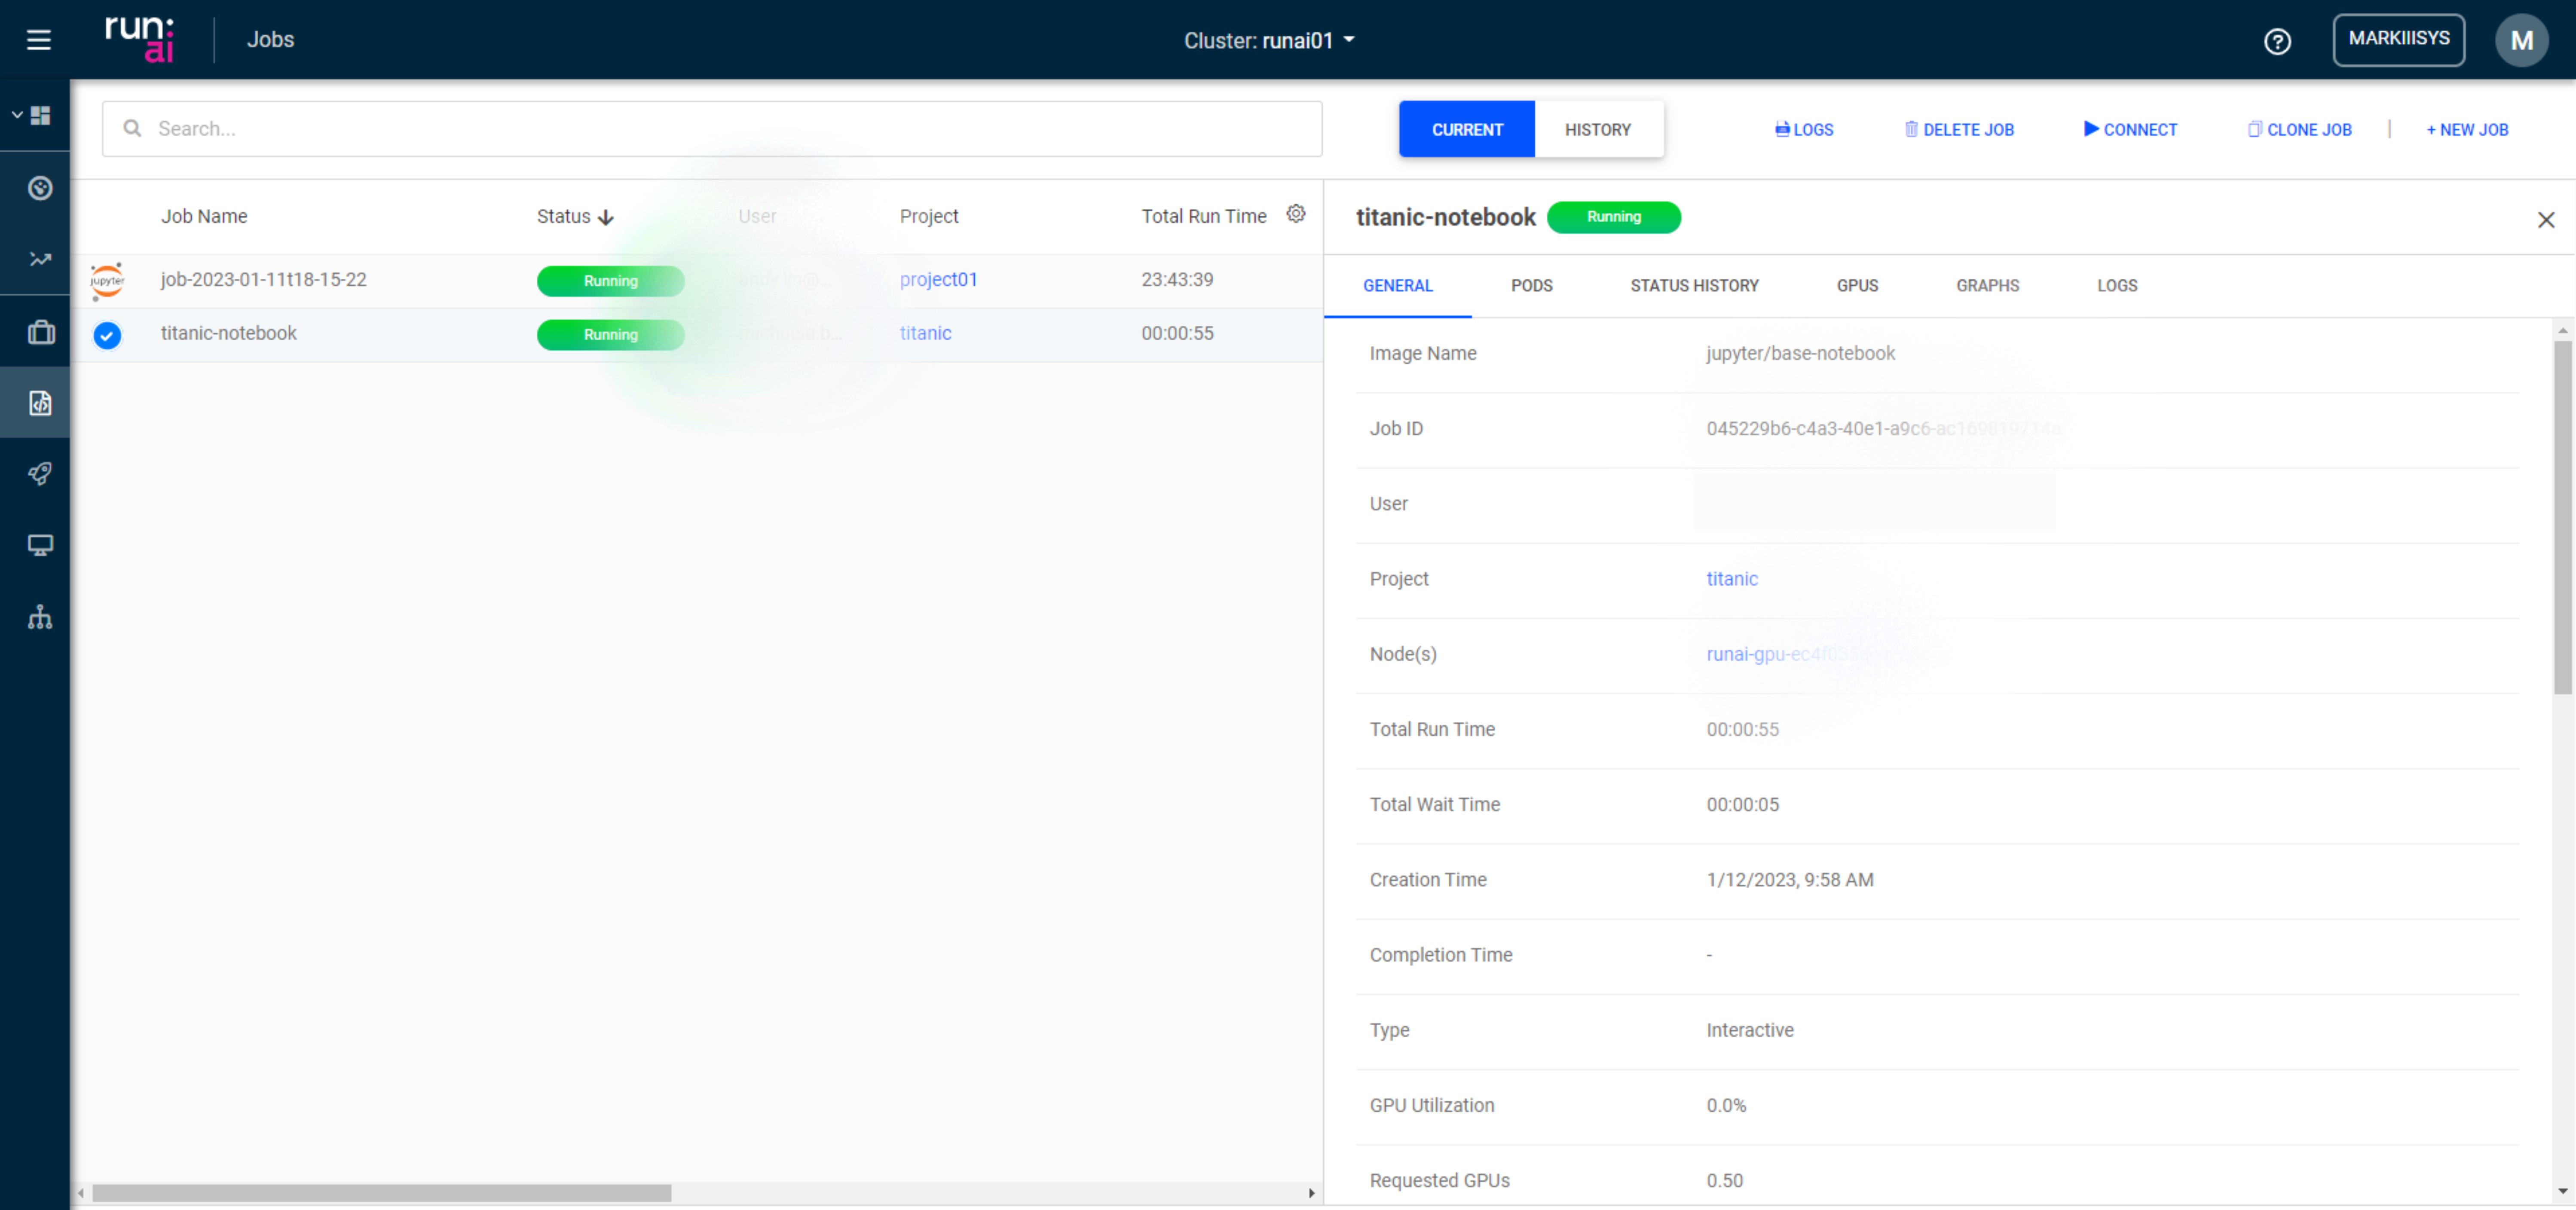 From here you can find the job’s logs and other useful information. When you are done with the job, you can click Delete Job on the top right or you can click Connect next to it to reconnect to this JupyterLab instance.