Reinforcement Learning AI using NVIDIA Isaac for Robotics
Introduction
To begin my journey of learning to use NVIDIA Isaac, I decided to start with the Reinforcement learning sample provided by NVIDIA. Click here for the link to the sample. In this sample the goal is to train a virtual version of NVIDIA’s Jetbot to follow a road by creating a simulated environment in Isaac to use for training. This tutorial will assume you already have the Docker Isaac container deployed and working. We will be running our Isaac instance remotely and then live streaming the GUI output to watch our training happen in real time. While running Isaac locally would be more convenient, this setup allows us to utilize server hardware to run Isaac at its full potential.
Preparation Steps
In order to edit the files we will be working with in a persistent manner, we will need to set up our container as is described here. Please follow the steps NVIDIA lays out for this. After this is done, you will also be able to edit your files via an IDE like Visual Studio which makes development more convenient.
You will also need to install the Omniverse Kit Remote Client in order to access the live stream of Isaac sim. Follow the guide here to download the client. We will come back to actually using it later in this tutorial.
Making Code Edits
Go ahead and SSH into the machine on which you are hosting the Isaac Docker container. If you follow the preparation steps, you should see a directory called python_samples in ~/docker/isaac-sim/. Your directory structure may vary slightly but should be something along those lines.

jetbot_train.py
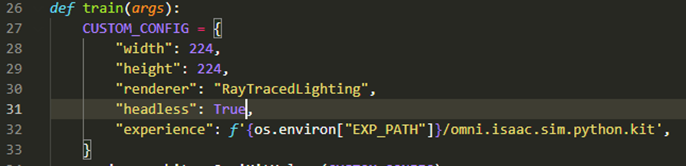
This directory contains the files we need for our reinforcement learning sample problem. We will have to edit some of these files slightly to make our livestream work. First, open up jetbot_train.py. On line 31, change args.headless to True.
On line 49, add in the five lines below:
ext_manager = omni.kit.app.get_app().get_extension_manager()
omniverse_kit.set_setting("/app/window/drawMouse", True)
omniverse_kit.set_setting("/app/livestream/proto", "ws")
ext_manager.set_extension_enabled_immediate("omni.kit.livestream.core", True)
ext_manager.set_extension_enabled_immediate("omni.kit.livestream.native", True)
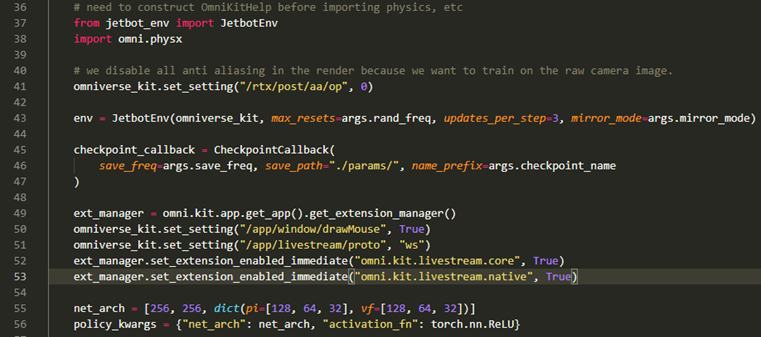
Your script should look like the screenshot above. These lines will start the livestream when our training script starts. Comment these out before running if you want to train headless (no GUI).
road_environment.py
Next, open up road_environment.py. Navigate to lines 41-47. Change the number after “offset” from 180 to 90. If the road tiles are not oriented correctly when we import them later in the tutorial, come back to these lines and change this value to other increments of 90 until they load correctly. Your script should look like the screenshot below when you are done.

Creating Road Tiles
Make sure you have the Reinforcement learning tutorial open to reference as you go through this process (linked here). Scroll down to the section titled Acquiring Road Tile Assets and follow the instructions to create your own road tiles until you get to the Nucleus Import step. You should now have 4 .fbx files ready to convert to .usd for use in Isaac. In order to do this conversion I had to install Isaac locally and then continue following the guide to convert these files. I did this in such a roundabout way because the Import button on the live stream remote version of Isaac didn’t work for me. Hopefully NVIDIA will address this bug in the near future.
Once you have your .usd files ready, use scp to transfer your files to the python_samples directory on your remote server.
Import Road Tiles
We will now use the livestream feature to interact with the Isaac GUI in order to place the road tile files we create in the correct location for use by our reinforcement learning scripts. SSH into your remote server and then run the following command to enter the Docker container:
docker exec -it isaac-sim bash
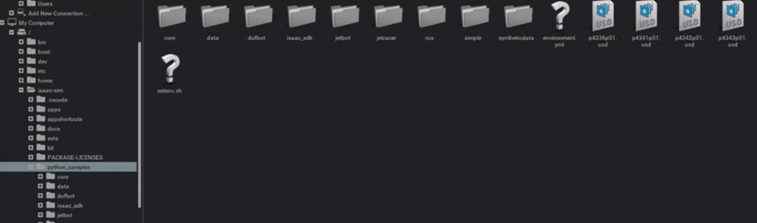
You should now see something similar to the screenshot below if you run ls:

We are now ready to run our first sample script in Isaac. Go ahead and run the command below to start a livestream of the Isaac GUI. Make sure you are in the /isaac-sim directory as shown above before attempting to run this command.
./python.sh python_samples/simple/livestream.py
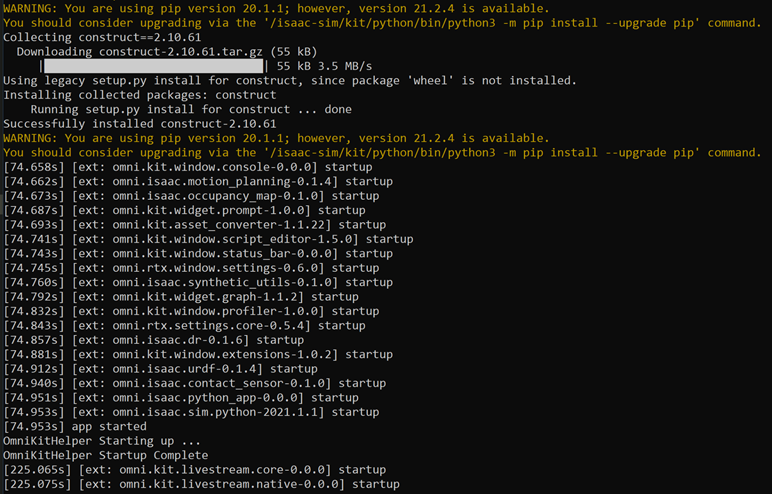
Don’t be alarmed if you see the error below after trying to run this script.
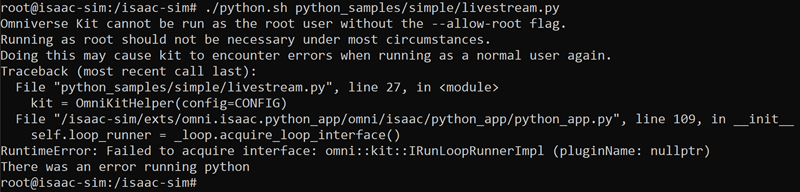
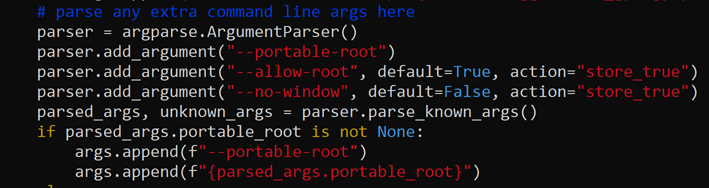
I was able to fix this by following the recommendation here. Open the file /isaac-sim/exts/omni.isaac.python_app/omni/isaac/python_app/python_app.py and navigate to line 172. You will want to change default=False to default=True on this line. The script should look like the screenshot below when you are done:
Now you should see a string of text on the screen which may take a few minutes, especially the first time you run it. It should look like the screenshot below after a bit which means your live stream is successfully running.
Now we need to use the Omniverse Kit Remote to view the livestream we are broadcasting. On your local machine, open a new terminal window. Navigate into the downloaded directory for Kit Remote (make sure to extract it first if it was zipped upon downloading). If you are on a Windows machine, you can run the command below to start Kit Remote. The command should be very similar on a Linux machine. Make sure you have the resolution flags set to something reasonable for your monitor and to put your remote machine’s IP address after the -s flag.
kit-remote.exe -s REMOTE.IP.GOES.HERE -w 1920 -h 1080
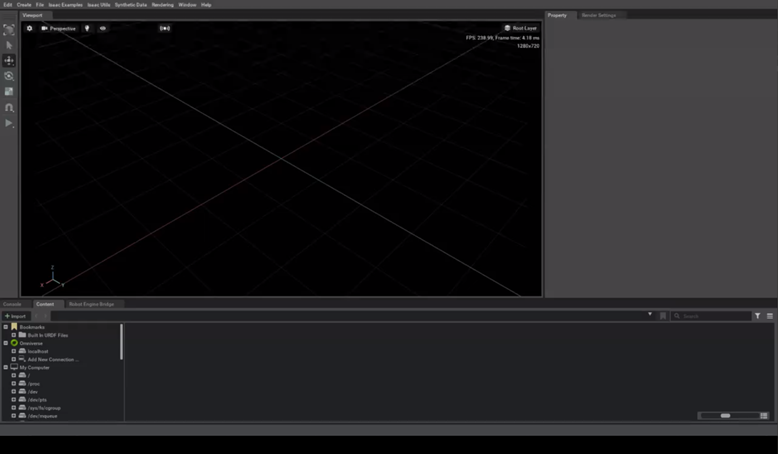
If everything is worked as it should, you should now see a screen that looks like the screenshot below:
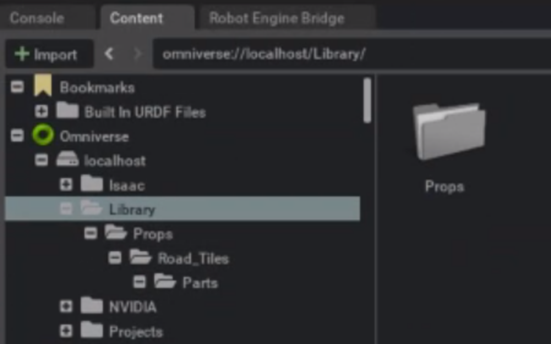
You will want to look at the bottom left corner and expand the localhost toggle under Omniverse. Right click on Library and make a new folder called Props within the Library folder. Keep making folders like this until you create a /Library/Props/Road_Tiles/Parts directory structure as shown in the screenshot below:
Then scroll down to My Computer and expand the / directory. Navigate to /isaac-sim/python_samples and click on python_samples. You should see your .usd files here if you SCP’ed them to the python_samples directory as described earlier.
Now copy and paste your .usd files to the /Library/Props/Road_Tiles/Parts folder you just created. Don’t be concerned if the livestream freezes up or errors occur while trying to accomplish all of this. It is still pretty buggy. However, with a couple restarts I was able to move these files where they needed to go. Enter Ctrl + c in both the Kit Remote and the Livestream terminals to stop either of these programs.
Running Reinforcement Training
Before we run our script we need to install some Python dependencies to run RL in Isaac. In order to do this, simply open a terminal, SSH into your remote machine, run docker exec -it isaac-sim bash, and after making sure you are in /issac_sim, run the following command:
./python.sh -m pip install -r python_samples/requirements.txt
Now we should be ready to run our reinforcement learning sample script. The setup will be the same as running the livestream earlier. We will run one terminal connected to our remote machine and run our python script from there. We will then also have a local terminal open from which we will launch Kit Remote in order to view the training in process.
In the terminal you used for installing your Python dependencies, run the command below to begin the RL script:
./python.sh python_samples/jetbot/jetbot_train.py
If it’s running successfully, you should see strings of coordinates being printed out rapidly that look something like this. These are the coordinates of your robot moving around its environment.

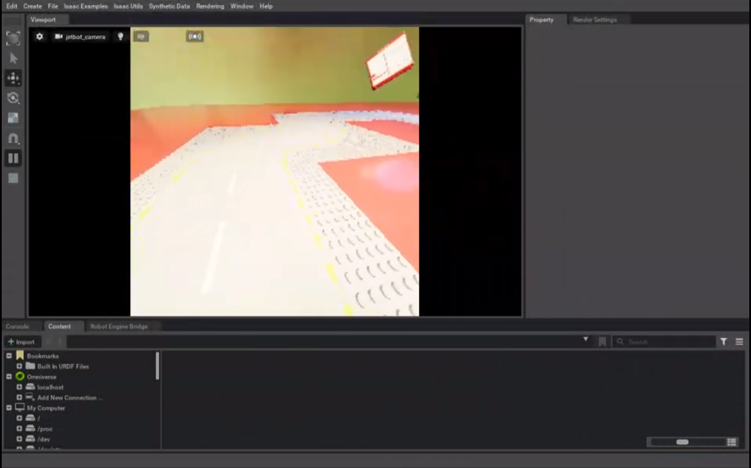
Now use Kit Remote just like you did in the Livestream sample to see the robot in action. It should look something like this.
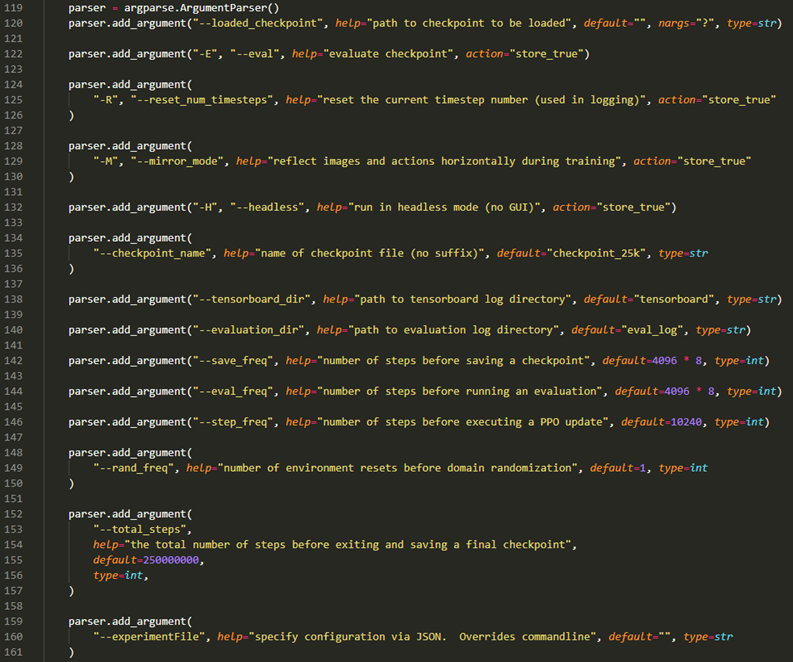
Now let’s go through some key arguments for controlling how training occurs through this script. Below is a screenshot from jetbot_train.py which describes the argument flags you can add to the script and the current defaults for each argument. You can change these by either passing these flags when you run the script or changing the defaults in the script itself. Here’s an example of what a command for running with argument flags:
./python.sh python_samples/jetbot/jetbot_train.py --evaluation_dir test_run_eval --tensorboard_dir test_run_tb
Training
It took over 2 days of training to produce a model that would follow the road the majority of the time. This training was done using a T4 GPU so better hardware would probably produce faster results. For the training run I used to produce a working version of the road-following Jetbot, I set the total number of steps to 50,000,000 and commented out the livestream code we added to jetbot_train.py. The command I used can be seen below for reference:
./python.sh python_samples/jetbot/jetbot_train.py --total_steps 50000000 --evaluation_dir long_run_eval --tensorboard_dir long_run_tb
Tip: If you are worried about keeping your internet connection stable through the whole run when connected to your remote machine, or if you just don’t want to have the terminal open for several days, you can use nohup to ensure your job will keep running even if you disconnect your shell from the remote machine. The command I used is below. It is the same as the normal command except you put nohup in the beginning and end it with a &
nohup ./python.sh python_samples/jetbot/jetbot_train.py --total_steps 50000000 --evaluation_dir long_run_eval --tensorboard_dir long_run_tb &
After 2+ days of Training
It took over two days to completely train the model using the command described above. To try out the trained version of the model, we will have to add another argument to our script running command to point to the last checkpoint of the model we trained. It should look like the command below:
./python.sh python_samples/jetbot/jetbot_train.py --loaded_checkpoint /isaac-sim/test_run_eval/best_model
Then if you run the livestream again through kit remote you should be able to see the robot following the road reasonably well. If you need improved performance you can always train for more steps.