Citrix ADC (NetScalers) upgrade via Citrix ADM
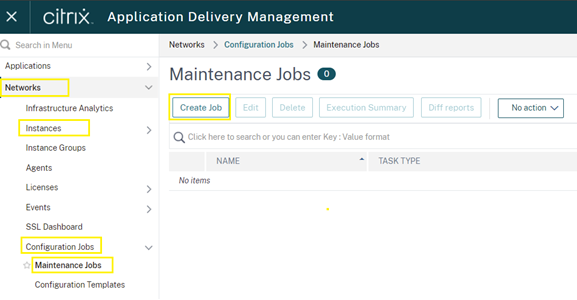
Step 1: From ADM, expand “Network + Instances + Configuration Jobs + Maintenance Jobs”. Select “Create Job” from the Maintenance Jobs window.
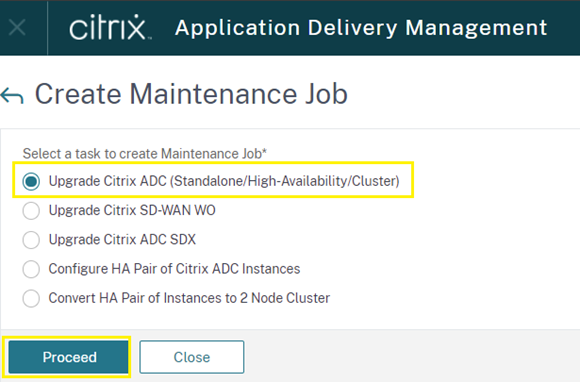
Step 2: Select the upgrade option applicable for the environment. In this case, the “Upgrade Citrix ADC (Standalone/High-Availability/Cluster” option were selected. Click the “Proceed” button to continue.
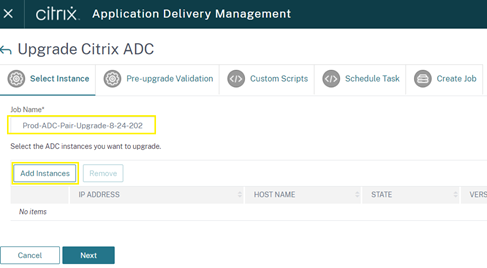
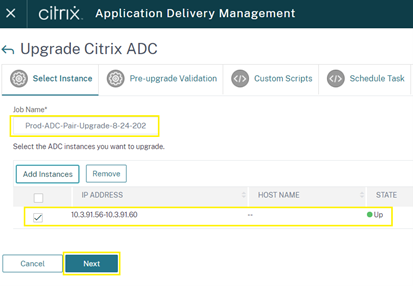
Step 3: From the “Upgrade Citrix ADC” windows, enter a Job Name for example: “Prod-ADC-Pair-Upgrade-8-24-2021”. Click on the “Add Instances” button to select applicable ADC targets for the upgrade.
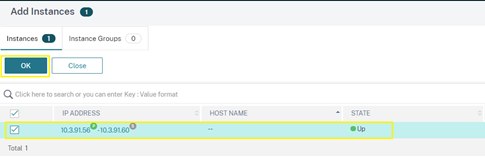
Step 4: From the “Add Instances” windows, select applicable ADC Instances and click the “OK” button.
Step 5: From the “Upgrade Citrix ADC” widnows, select the “Next” button to continue.
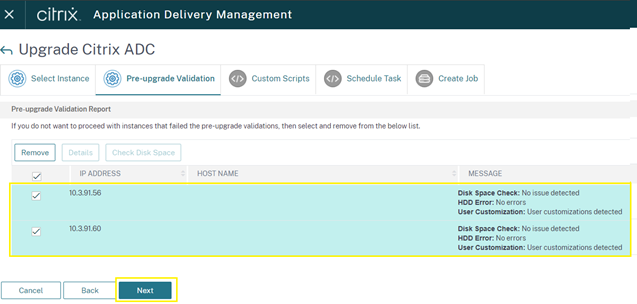
Step 6: ADM proceeding with the pre-upgrade validation process, select any ADC Instances targeted for the upgrade and click on the “Next” button to continue. Be sure to address any issues if identified before proceeding with the upgrade process.
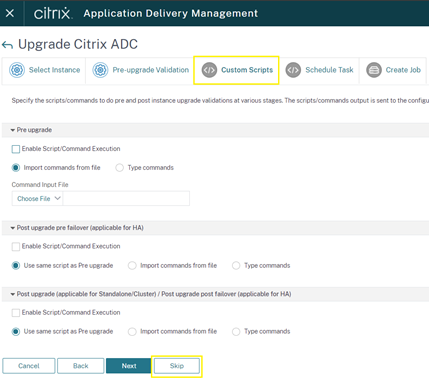
Step 7: From the “Custom Scripts” windows, select the “Skip” button to continue.
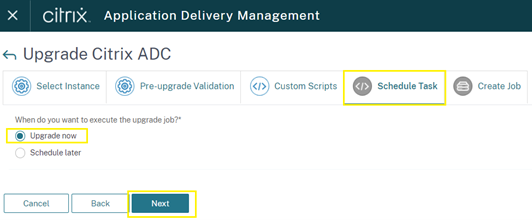
Step 8: From the “Schedule Task” windows, select the “Upgrade Now” option or you can schedule the upgrade for a later time. Select the “Next” button to continue.
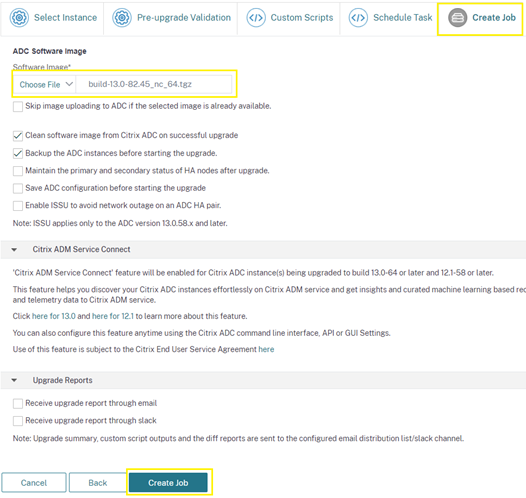
Step 9: From the “Create Job” window, select appliable upgrade file previously downloaded for the environment. Select the “Create Job” button to continue.
Step 10: From the “Maintenance Jobs” windows, select the appliable job. Click the “Execution Summary” button to proceed with the upgrade.
Note: Once the process started, you’ll not be able to cancel the job.

Step 11: From the “Execution History” windows, select the targeted job and select the “Details” button for a more details status.

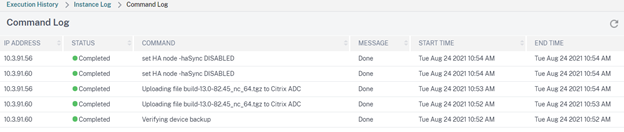
Step 12: From the “Instance Log” windows, select the appliable ADC appliances. Select the “Command Log” button to display all appliable commands executed and for more details.

Step 13: From the “Command Log” windows, you can see specific steps and commands applied to the ADC appliance during the upgrade process with completion status and date and time stamps.
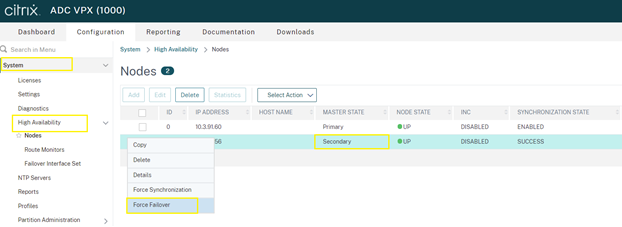
Step 14: Logon to the former primary ADC appliance, in my case it is “10.3.x.x” and browse to “System + High Availability” and select the “Second” node.
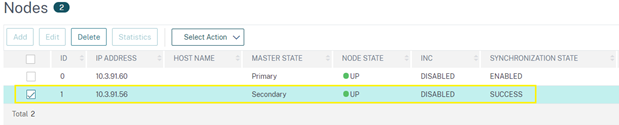
Step 15: From the “Nodes” windows, select the “Force Failover” option.
Step 16. ADC upgrade completed.